We were sitting at a table with friends one morning when we began discussing how we grow our own fodder. They began to humorously describe how they were at a local grocery store that was selling wheatgrass.
Our friend said really loudly in this store, “Well, they are just growing fodder and charging people an arm and a leg for it!”
But then she made an ingenious statement to us around that table, “If you all can grow fodder you really should try your hand at growing microgreens. It could be another source of income for the homestead.”
My brain immediately began to dance with ideas on how and where to grow microgreens. This was a perplexing thought because truthfully, I had never heard of them before.
Now, many years later, I’m so thankful for my friend’s idea, and she is right, whether you want to grow microgreens for your own consumption or not, it could potentially be a great source of income for your homestead.
Here is all you need to know about microgreens:
What Are Microgreens?
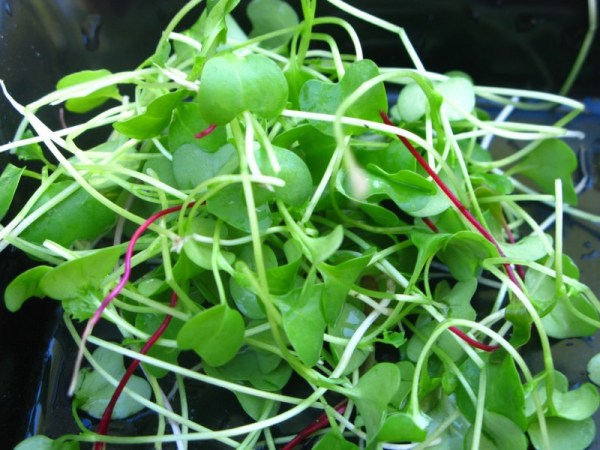
Microgreens are exactly what their name suggests. They are smaller or immature versions of plants, meaning that you harvest greens like herbs, greens, and veggies when they’re around 2-inches tall.
But people use them a lot on their salads and as additions to their dishes because of the amazing benefits they hold. Microgreens are an excellent source of nutrients and are also full of enzymes because of how fast they grow.
Also, at the end of the day, you could have a year round vegetable source right on your counter. That was what was so exciting to me when I began considering growing my own microgreens.
However, if you would consider them as an income source, many high-end restaurants use them for garnish to their dishes.
So as you can tell they are very diverse little plants that pack a ton of benefits for nutrition and monetarily.
What Microgreen Varieties Are There?
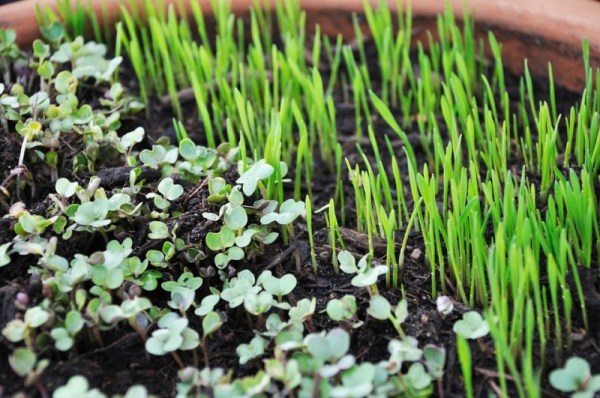
When I began studying up on microgreens, I was overwhelmed. There are a ton of different varieties of microgreens. Some are known for being easier, some are known for being harder, and some are just known as a common type of microgreen that people really enjoy.
| Easy-to-grow Microgreens | Most Common Microgreens | Complex Microgreens | Other Varieties |
|---|---|---|---|
| Chinese cabbage | Lettuce | Sweet basil | Broccoli raab |
| Radish | Kale | Sunflower | Rutabaga |
| Turnip | Spinach | Sorrel or Marjoram | Arugula |
| Bok choy | Radish | Fennel or Dill | Mint |
| Sesame | Beet | Cilantro | Cheryl |
| Watercress | Watercress | Carrot | Celery |
| Lettuce | Herbs | Beet or Chard | Escarole |
| Asian greens | Greens | Pea | Chicory |
| Endive | Cabbage | Red Russian Kale | Spreen |
| Mustard | Mustard | Thai basil | Orach |
| Chia | Onion | ||
| Sunflower | Chives | ||
| Buckwheat | Bunching onions | ||
| Garlic chives | |||
| Buckwheat | |||
| Flax | |||
| Corn | |||
| Wheat | |||
| Millet | |||
| Alfalfa | |||
| Clover |
As you can tell, some of the most widely grown microgreens are not necessarily the easiest. They are what people would use on a more regular basis.
So realize that certain microgreens may take a little experience to be able to grow them and grow them well.
But any plant that you enjoy, could potentially become a microgreen. The important characteristic is that the plant is edible from the root all the way to the leaves.
How to Grow Microgreens
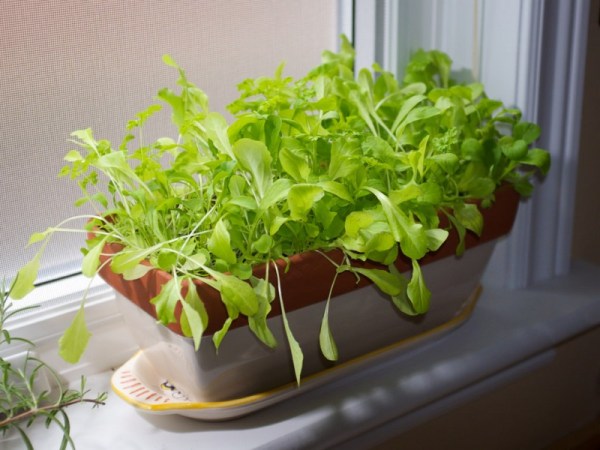
Growing microgreens doesn’t require much equipment. Truthfully, the only complicated part to growing microgreens is that some of the greens have a harder time germinating than others and some are more susceptible to mold than others.
So you’ll need to be sure to do your research on which specific green you are growing, so you’ll know what you’re up against.
Things You’ll Need:
- A Grow Tray
- Soil
- Grow Light or Shop Light (Optional)
- Warming Mat (Optional) or Heating Pad (Optional)
- South Facing Window
- Microgreen Seeds
1. Set-Up Your Tray
You’ll need to begin with a grow tray or just a shallow tray of some sort. I listed a link under the materials as to where you can purchase grow trays. If you can’t purchase a grow tray, use the aluminum pans that are meant for lasagna to grow your microgreens in.
Once you decide which type of tray you will use, you need to figure out where you will place the tray. It could be in a south facing window if you have one.
However, if you don’t, you’ll need to find a place to set-up your Grow Lights or Shop Light. Again, I recommend using shop lights if you are on a budget. We use them instead of Grow Lights and have had great success with them.
So if you are going with artificial light, you can either set-up a grow station in your house, or you can just hook the artificial light up under a kitchen cabinet and allow the tray to sit on your counter under the light.
Now that you have your grow area determined, you are ready to start growing microgreens in the space. 
2. Add the Soil
Your tray is set-up on your grow area so now you’ll need to add the soil. It is recommended to use an organic soil mix, but truthfully, whatever soil you have on hand will do the trick.
So you’ll want to fill your tray with about one inch of soil. Then you’ll need to smooth it over to make everything even for planting.
Now, if you only want to grow microgreens during the warmer months, you can actually clear space in your garden for them and grow them like you would their full-size counterparts.
But if you are sticking to the kitchen counter, then you’ll need to place an inch of soil in the tray so you can move on to the planting part.
3. Plant Your Seeds
Now that you have your grow station and your planting tray ready to roll, you’ll need to introduce the seeds into the mix.
You’ll sow your seeds by scattering them over the tray. Be sure to sow your seeds thicker than you would if you were planting them in a normal garden space. You do this because you need to keep in mind that microgreens only grow to be about an inch or two tall.
If you want high yields then you have to sow thickly to achieve that. Plus, the microgreens don’t take up as much space as full fledge vegetables so they don’t need as much room to grow. Keep this in mind as you are planting your seeds.
But just know that you can sprinkle the seeds heavily over the dirt. There is no reason to try to make little rows or holes in the dirt. A substantial sprinkling will do the trick.
See, even planting the microgreens is a simple task. A little trick to add to the mix is if you are worried about your seeds germinating, or even if you’d like to speed up the sprouting process, soaking the seeds in water overnight can help things along.
4. Tuck in Your Seeds
Now that your seeds are planted, you’ll need to cover them with a healthy dose of soil. Be sure that all of your seeds are covered in this step so they have a greater chance of sprouting.
After you’ve got all of your seeds neatly tucked into their new countertop garden bed, you’ll need to place water in a spray bottle. These bottles can be purchased here or purchased at the dollar store as well.
You can also turn an old spray bottle that had other products in it into your spray bottle for this purpose. It’s up to you.
Either way, you’ll need to fill up the spray bottle with water. Then spritz the soil and freshly planted seeds with water. You want the soil coated with water but not to the point of being soggy.
Once you’ve accomplished this task, you are ready to move on to the next step.
5. Pull Out the Heat
So your seeds are planted and spritzed. Now what?
Well, now you pull out the heat to give the seeds everything they need to germinate. If you are going to use a warming mat, you’ll want to place it underneath the tray. If you can’t afford a warming mat but have a heating pad on hand, then you ought to try it.
However, I’ll give you a word of caution. Heating pads are not meant to mix with water. Be sure that when spritzing the tray that you don’t get the heating pad wet.
Also, keep an eye on it. I’m all about using household items to accomplish a task, but you just don’t want to have a fire hazard on your hands either. Keep a close eye on everything if you indeed use a heating pad during the germination period.
Common things to remember whether you use a heating pad or a warming mat; don’t leave them on when you aren’t home and don’t leave them on overnight.
Once you see that the seeds have germinated and are sprouting, if you use a warming pad of any type, you can remove it from the tray.
Whether you use the heating mat or not, you’ll need to place the tray near the south-facing window or under the artificial grow light at this point.
6. Spritz Your Seeds
Now that your plants are all settled into their new home, you’ll need to keep that handy bottle of water nearby. The reason is because you will want to spritz those seeds a few times a day while you are waiting for the seeds to germinate.
Again, make sure you do a light spritzing so the soil has enough moisture. However, don’t water to the point of being soggy.
7. Harvest Your Microgreens
In about 2-4 weeks, your microgreens should be ready to harvest. You’ll harvest them by using your kitchen scissors. You’ll want to cut them right above the soil level.
Then you’ll want to rinse the freshly cut microgreens under the water. I like using a colander for this step, but you can simply hold them in your hand and rinse them if you wish.
Finally, they are ready to be added as a nice addition to any dish or salad. You can enjoy the fact that you grew your very own greens and feel confident about the nutrients your body will get from this product.
8. Rinse and Repeat
You can grow multiple types of microgreens, obviously. (See above for all of the ideas for different microgreens.) And you can grow them at the same time if you have the grow space.
However, if you don’t, once you finish up harvesting one tray you simply compost that tray and start all over again with a different type of seeds.
Some people say you can go through and pull out the microgreens by the roots and replant, but I think that is a lot of work, and you’ll probably still end up with volunteer plants from your last harvest.
But if this doesn’t bother you, then you can certainly do that. If you want to know that you are only eating what you currently planted, then I recommend that you compost the previous harvest and start fresh.
Well, that is all there is to growing your very own microgreens. It sounds simple enough and truly it is pretty easy to do.
But I’d love to hear your thoughts and experiences. Have you ever grown microgreens? How do you do it? What have you grown? How do you use them? Do you use it as an income source? If so, how did you find buyers and market your product?
We love hearing from you all, so please leave us your comments below.
Self-sufficiency and Preparedness solutions recommended for you:
Survival System (Learn The 7 Secrets Every Family Must Know To Survive Any Disaster Or Crisis)
Food for Freedom (If I want my family to survive, I need my own food reserve)
Alive After the Fall (Build yourself the only unlimited water source you’ll ever need)
Liberty Generator (How to gain complete energy independence)

