
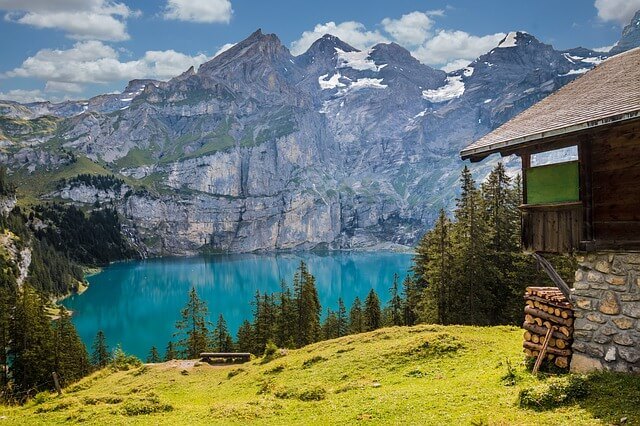
When you sit down and think about a survival scenario, you have to consider several dangers and fears. The four primary pillars of survival are food, water, fire, and shelter. However, there is a definite pecking order among these priorities.
A common saying in survival is that you can make it three weeks without food, three days without water, and three hours without warmth from fire or shelter. There are exceptions to this rule. But overall, it is fairly accurate.
This means that one way or another, you have to find warmth immediately. You may be injured or wet, and this makes exposure even more deadly. Most people have never truly slept outdoors without any time of shelter. Sorry, your pop-up camper and tent do not count.
While camping is a great practice, you never truly test yourself until you are forced to provide your shelter from scratch. In this article, I am going to cover the most straightforward and effective survival huts that can be built.
There are plenty of more impressive and more elaborate options, but who cares if you do not survive the night.
Why Shelter And Not Fire?
One cannot argue that a roaring fire on a cold night sounds pretty appealing. Fire can:
· keep you warm
· provide light
· repel bugs
· scare predators
· cook food
· purify water
· boost your mood
However, most people greatly underestimate the difficulty of building a fire in the wild. Sure, I watched my dad light some newspaper under a teepee of split logs when I was a kid. In survival, your reality is much different.
First, we can start with your materials. The fuel, tinder, and kindling you need in the wild are usually wet from dew or rain. This makes most of it virtually worthless.
Tinder that lights and stays lit for a few minutes is very hard to find. The list of good tinder sources in most wilderness areas is small. That means that you may be out of luck unless you have a lighter or matches, and surprisingly even those tools can often fail to get a fire lit.
Get Started Early
Usually, the only method to ensure protection from exposure is to spend your time building a shelter. The tricky part is that you never really know how long it takes to complete the construction.
You can limit the time by keeping it small and simple. But even then, you do not know where your supplies and site is going to be.
I spent 15 hours on a shelter before, and I spent 15 minutes too.
You do not know which it will be until you get moving and assess your situation. Look for a flat spot protected from the wind that will not gather water. Also look for lots of downed logs, and dead branches as these will make for the easiest building materials.
Super Shelter – Mors Kochanski’s
Keep it Simple
As you are assessing your available resources, do not forget to consider the large structures that nature has provided. A cave is a damp and nasty place to sleep, but with some bedding to keep you off the ground, it may keep you out of the rain.
You can always lean poles against a rock face, so you only have to build one side of your shelter. You can even climb under a large spruce tree in a snow storm and pull some branches over you, or use a downed log as a ridge pole.
If you get creative, you can find partially built shelters all throughout the woods.
You also want to keep your shelter small and simple. To stay warm, your shelter must keep a small amount of air heated by your body. This means no drafts and no large spaces. This is the same principle that sleeping bags use.
It also must keep you dry, so a waterproof roof is vital in rainy areas.
On my most recent survival challenge, I built my shelter under an hour and had plenty of time to gather food and water. It rained the whole time but my shelter still kept me dry until I headed home.
3 Shelter Models
Lean-to Shelter
This shelter design is one of the most simple to build, and I use it all the time. It is ideal to keep it out of the wind or rain and works great with fire. The best part is you can throw one up quickly with materials you can find anywhere.
I like to build one between two trees, so the support poles are already in place. You then need a ridge pole about eight to ten feet long. You can wedge this on top of branches, or you can tie it to the trunk of the tree.
Next, you want to lean additional poles against your ridge pole at a 45-degree angle. Try to pick straight poles and get them as close together as possible. Keep the wind direction in mind when deciding on how to orient your lean-to.
At this point, the shelter should be able to block the wind at least. Add several inches of dry leaves or grass underneath for bed. If you can get at least four inches of compacted insulation, you will be much warmer.
However, if you want to block the rain, then you still have work to do. You need to pile as much dry debris on top of the shelter as you can. I am not exaggerating when I say that going four feet thick is about right.
If you are using dry grass, try to shingle it from the bottom up, so the water cascades off of the shelter
Sheltering in Place – What Do You Need To Know
Debris Hut
This design assumes that you are facing a cold night without fire. It is built to entirely enclose your body and hold in as much heat as possible.
Your ridgepole is about ten feet long. However, in this case, you are building a long tripod. You need two support poles about four feet long. If you can find poles with a ‘Y’ at the end, this is the best.
You need to rest these three poles against each other, so the structure is stable. You can also tie it off with cordage or sharpen the support poles to drive them into the ground.
Next, you want to lean additional poles on both sides of the ridgepole at a 45-degree angle. Again, find straight poles and keep them as close together as possible. Finally, you want to add your bed and then pile on the debris all around the shelter.
When you are done, it should look like a huge pile of leaves or grass. Thicker is always better for a debris hut. Because you will not have a fire, you can fashion a door using evergreen branches, or you can just pull a pile of leaves into the doorway to trap more heat.
Snow Cave
If you find yourself above the tree line in a barren, snowy wasteland, you may feel nothing but despair. With no building materials, how do you build a shelter? Start digging.
For this project, you need a mound of snow at least four feet deep. If you do not have one, you can pile up snow to accomplish the same thing. Here’s how it is done:
1. Collect a bunch of sticks at least six inches long and push them into the roof of your mound.
2. Drop down to ground level and start digging out a small doorway large enough for you to fit.
3. As you dig deeper into your cave, start digging higher to create your walls and ceiling. The sticks are in place, so you know when to stop digging to avoid a cave-in. Dig your cave wide enough for you to turn around on your hands and knees.
4. Form a shelf to the back of your cave large enough for you to sleep. By elevating your sleeping platform, you stay closer to warm air and let the cold air sink below.
5. Use a chunk of ice or your pack to block the doorway, but you should be fine even without this step.
All of the snow you’ll dig out will form a pile that does a good job of blocking the wind.
Be Prepared
The best way to build a survival hut is to have supplies with you. For me, this includes a large, sturdy emergency blanket, a knife, and paracord.
A good emergency blanket is small when folded and reflects 90% of your body heat back to you. It is waterproof, durable, and easy to form into either a lean-to or an A-frame shelter.
I use 550 paracord because it is incredibly durable and can be split open with your knife to use each of its interior strands separately. My boots are laced with paracord, have a paracord bracelet, and have a paracord lanyard on my water bottle.
The emergency blanket fits in a pocket or in any pack I might carry with me. My knife is either in my pocket or on my belt all the time.
Final Thoughts
You certainly do not need to be an architect to build a survival hut. However, you need to know some of the basic designs and principles. You see dozens of different shelter designs on survival television shows, but look closer.
They are almost a variation of one of these three models. The key is to get some practice. The next time you go camping, leave the tent at home and test out your abilities (via basisgear.com).
![]()
Self-sufficiency and Preparedness solutions recommended for you:
Survival System (Learn The 7 Secrets Every Family Must Know To Survive Any Disaster Or Crisis)
Food for Freedom (If I want my family to survive, I need my own food reserve)
Liberty Generator (How to gain complete energy independence)
Backyard Liberty (Obama’s hidden agenda: more than just your guns…)